step by step face painting guide
Step-by-Step Face Painting Guide: An Overview
Face painting offers a creative outlet for all ages, transforming individuals with vibrant designs; this guide details techniques,
supplies, and safety measures for stunning results, from simple to complex looks.
Revit’s face-based families are crucial for hosting elements onto object faces, offering flexibility when wall hosting isn’t viable.
Creating offset planes aids in precise sketch point placement, while converting element-specific families to face-based is achievable.
Selecting faces, vertices, or edges in Blender, and inverting selections, streamlines modeling, while aligning elements to views in 3ds Max
enhances precision, and extruding illustrator files creates 3D forms, all contributing to a polished final product.
Face painting is a delightful art form, captivating both artists and recipients with its transformative power. It’s more than just applying color; it’s about creating joy, fostering imagination, and bringing characters to life. From simple swirls and dots to elaborate designs, face painting offers a unique avenue for self-expression and festive celebration.
Historically, body and face painting have been integral parts of cultural rituals and ceremonies worldwide. Today, it’s a popular activity at parties, festivals, and Halloween events. Understanding the basics – from selecting appropriate paints to mastering fundamental techniques – is key to achieving professional-looking results. This art form requires patience, a steady hand, and a willingness to experiment.
The ability to host families onto faces within 3D modeling software, like Revit, mirrors this creative process. Just as a painter builds a design layer by layer, designers utilize face-based families to attach elements to object surfaces, ensuring precision and adaptability. This introduction sets the stage for a journey into the world of face painting, blending artistic expression with technical skill.
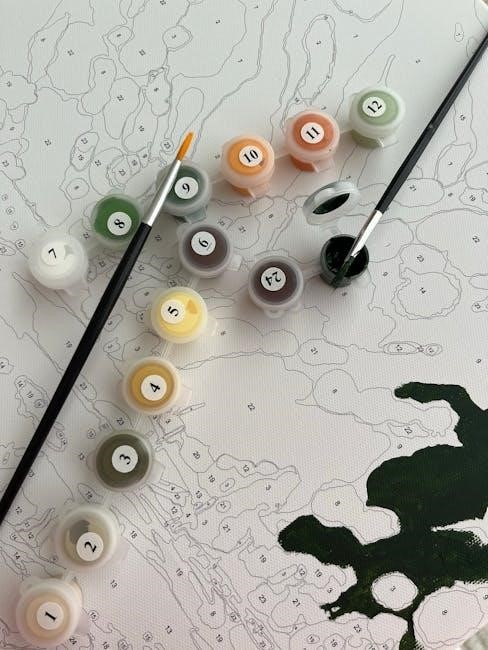
Essential Face Painting Supplies
Gathering the right supplies is crucial for a successful face painting experience. High-quality, water-based face paints are paramount, ensuring vibrant colors and, most importantly, safety for the skin. Avoid acrylics or oil-based paints. A variety of brushes – round, flat, and angled – are needed for different effects, mimicking the precision of selecting vertices and edges in 3D modeling.
Sponges, both wedge-shaped and round, are excellent for base layers and creating textures. Water containers (one for rinsing, one for activating paint) are essential, alongside paper towels for blotting. Glitter, stencils, and liners add detail and flair, akin to extruding illustrator files for 3D forms.
Don’t forget barrier cream to protect the skin and wet wipes for quick cleanups. A mirror is helpful for both the artist and the subject. Just as aligning elements in 3ds Max enhances precision, having organized supplies streamlines the creative process, allowing for seamless and enjoyable face painting.
Preparing the Face for Paint
Proper preparation is key to ensuring a smooth application and preventing skin irritation. Begin by gently cleansing the face with mild soap and water, removing any oils or lotions – much like ensuring a clean base for 3D modeling. Pat the skin dry with a soft towel. Applying a thin layer of barrier cream creates a protective shield, similar to hosting elements onto a face in Revit.
Test the paint on a small area of skin first to check for any allergic reactions. Avoid painting over sunburned, irritated, or broken skin. Tie back hair to keep it out of the way. Consider using a covering, like a towel, to protect clothing.
Just as offsetting planes aids precision, a well-prepared face provides a flawless canvas. This careful preparation, like aligning elements in 3ds Max, ensures the final design looks its best and minimizes any potential discomfort.
Basic Face Painting Techniques
Mastering fundamentals like base layers, blending, and brush control unlocks creative potential; these techniques, akin to 3D modeling, build a solid foundation for artistry.
Applying a Base Layer
Establishing a smooth base is paramount for vibrant, even face paint application, much like preparing a surface for 3D modeling. Begin with a clean, dry face, and select a base color appropriate for your design – white is common for brighter effects, while skin-toned bases offer a more natural look.
Using a broad, flat brush or a sponge, apply the base color in gentle, even strokes, avoiding excessive pressure. Work in sections, ensuring complete coverage without clumping or streaking. Think of it as laying down the initial geometry in a digital space, ensuring a solid foundation for subsequent details.
Allow the base layer to dry slightly before adding further details; this prevents colors from muddying. Consider using a setting spray to enhance longevity and prevent smudging, similar to applying textures in 3D software. A well-applied base layer significantly impacts the final appearance, providing a flawless canvas for your artistic expression.
Blending Colors Effectively
Seamless color transitions elevate face painting from amateur to artistic, mirroring the smooth gradients achievable in digital art. Begin by applying the lighter color first, then gently introduce the darker shade along the desired blending line.
Utilize a clean, damp brush or sponge to soften the edges where the colors meet, working in small, circular motions. Avoid harsh strokes, as these create visible lines. Think of it as smoothing vertices in a 3D model to create organic shapes.
Layering colors gradually is key; build intensity slowly to prevent muddiness. Experiment with different brush types – a filbert brush offers excellent control, while a sponge creates softer, diffused blends. Practice makes perfect; blending requires patience and a delicate touch to achieve professional-looking results.
Using Different Brush Types
Brush selection dramatically impacts the final face painting outcome, much like choosing the right tool in 3D modeling software. Round brushes excel at outlining and detailed work, offering precision for fine lines and intricate designs, similar to selecting individual vertices.

Flat brushes are ideal for covering larger areas quickly and efficiently, laying down base colors or creating bold shapes. Filbert brushes, with their rounded edges, provide versatility for blending and softening edges, mirroring smooth transitions.
Sponges create textured effects and soft washes, perfect for shading or adding depth. Angle brushes are useful for creating sharp lines and geometric shapes. Experimenting with various brushes unlocks creative possibilities, allowing you to achieve diverse looks and refine your technique.
Simple Face Painting Designs
Beginner-friendly designs like butterflies, cats, and superhero masks build confidence and skill; these projects utilize basic techniques and readily available resources for delightful results.
Creating a Butterfly Design
Begin with a light base coat, often white or a pastel shade, covering the area around the eyes and extending towards the temples. Using a fine-tipped brush, sketch the outline of butterfly wings, mirroring the shape on both sides of the face.
Next, fill in the wings with vibrant colors, blending shades for a gradient effect. Consider using sponges for a softer, textured look, especially for larger areas. Add intricate details like swirls, dots, and lines within the wings using a liner brush.
Enhance the design with glitter or face paint gems for extra sparkle. Remember to avoid the immediate eye area, prioritizing safety. Finally, step back and admire your colorful creation – a beautiful butterfly transformation!
For added flair, extend the wings slightly beyond the natural brow line, creating a more dramatic effect. Experiment with different color combinations and patterns to personalize the design.
Painting a Cat Face
Start with a base coat of fur color – typically orange, grey, or black – covering the forehead, cheeks, and chin. Use a larger brush for this initial layer, ensuring even coverage. Next, outline the cat’s nose and mouth with black paint, creating a triangular nose and a small “Y” shaped mouth.
Add whiskers extending outwards from the nose using a fine-tipped brush. Paint the inner ears pink, and outline the outer edges in black. Don’t forget to add small black dots for the eyes, or create expressive cat-eye shapes with eyeliner-style precision.
Enhance the design with white highlights around the nose and mouth, adding dimension. Consider adding small spots or stripes for a more realistic feline look; Remember safety, avoiding the eye area!
For a playful touch, add a tiny pink tongue or a mischievous grin. Experiment with different ear shapes and whisker styles to personalize your cat creation.
Designing a Superhero Mask
Begin by sketching the desired mask shape lightly onto the face with a white face paint crayon or a very light shade of paint. Popular choices include classic superhero styles like Batman or Spiderman, or create a unique design! Outline the sketch firmly with a bold color – black, blue, or red are excellent options – using a fine-tipped brush.
Fill in the mask with the chosen color, ensuring even coverage. Add details like emblems, lightning bolts, or geometric patterns using contrasting colors and a smaller brush. Consider incorporating shading and highlights to give the mask depth and dimension.
Extend the mask slightly beyond the natural eye line for a dramatic effect. Remember to avoid painting too close to the eyes, prioritizing safety.
Finalize the look with glitter or metallic accents for extra sparkle and superhero flair!
Intermediate Face Painting Designs
Elevate your skills with designs like Spiderman, tigers, and princess crowns, demanding blending, shading, and detail work for impressive, realistic transformations.
Painting a Spiderman Design
Begin with a red base covering the entire face, ensuring even coverage for a vibrant foundation. Next, using black face paint and a fine-tipped brush, carefully outline Spiderman’s iconic mask shape around the eyes and extending across the forehead.
Focus on creating the web pattern; start from the corners of the eyes and extend outwards, painting thin, curved lines resembling a spiderweb. Vary the thickness and spacing of the lines for a more realistic effect. Utilize a lighter shade of red or white to highlight certain web strands, adding depth and dimension.
Pay attention to symmetry, ensuring the web pattern is balanced on both sides of the face. Add small black details around the eyes to enhance the mask’s shape. For advanced painters, consider adding shading around the edges of the mask to create a more three-dimensional appearance. Finally, a touch of white highlight on the web can make it pop!
Creating a Tiger Face
Start with a yellow base coat, covering the entire face to establish the tiger’s signature color. Utilize a sponge for a smoother, more even application, avoiding harsh lines. Next, employ orange face paint, slightly darker than the base, to add shading around the cheeks and temples, creating a sculpted effect.
Focus on the stripes; using black face paint and a medium-sized brush, paint bold, vertical stripes across the forehead, cheeks, and chin. Vary the width and length of the stripes for a natural, wild appearance. Don’t make them perfectly symmetrical – tigers aren’t!
Add defining features: paint a black nose and whiskers extending outwards from the cheeks. Use white face paint to highlight the inner corners of the eyes and add small white spots around the mouth. Finally, consider adding black eyeliner to accentuate the eyes, completing the fierce tiger look.
Designing a Princess Crown
Begin with a light blue or lavender base around the forehead area, establishing the foundation for the crown. Using a fine-tipped brush and gold or silver face paint, carefully outline the crown’s shape – points are essential! Start by sketching the basic crown outline, then refine the details.
Add jeweled embellishments: paint small circles or teardrop shapes within the crown’s structure using vibrant colors like red, pink, and purple. Outline each “jewel” with white paint to make them pop and appear more three-dimensional. Vary the sizes and colors for a regal effect.
Incorporate swirling designs: use a thin brush to add delicate swirls and flourishes around the crown and jewels, enhancing its elegance. A touch of glitter can elevate the design, adding sparkle and magic. Finish with a subtle highlight along the top edges of the crown for dimension.
Advanced Face Painting Techniques
Mastering shading, highlights, and texture elevates designs; sponges create unique effects, while liners define details.
Precision and blending are key to realistic, captivating face art creations.
Using Sponges for Texture
Sponges are invaluable for creating diverse textures in face painting, moving beyond smooth, flat applications. Different sponge types – sea sponges, synthetic sponges, and even cosmetic sponges – yield unique effects. For a scaled texture, like on a dragon or mermaid, gently pounce a sponge loaded with paint onto the skin. This stippling motion builds up layers, creating a realistic, organic look.
Cut sponges into custom shapes for specific patterns. A ridged sponge can mimic fur, while a crumpled sponge adds a rocky or uneven surface. Remember to always use clean sponges, and avoid pressing too hard, which can disrupt underlying layers. Experiment with different paint consistencies; thicker paint will create bolder textures, while thinner paint offers a more subtle effect. Layering colors with sponges adds depth and dimension, enhancing the overall design.
Consider using a circular motion for a softer texture, or a tapping motion for a more defined pattern. Sponges are particularly effective for creating backgrounds or filling large areas quickly, adding visual interest and complexity to your face painting creations.
Creating Shading and Highlights
Shading and highlights are crucial for transforming a flat face painting design into a three-dimensional masterpiece. Utilize darker shades of your base color to create shadows, defining contours and adding depth. Apply these shadows to areas that naturally recede, such as under the cheekbones, along the jawline, or around the eyes. Blend the edges seamlessly to avoid harsh lines, creating a soft, natural transition.
Conversely, use lighter shades – or even white – to create highlights, emphasizing areas that protrude, like the brow bone, the bridge of the nose, or the tops of cheeks; Highlights catch the light, making those areas appear closer and more prominent. A small, angled brush is ideal for precise highlight application.
Experiment with layering shades to build up intensity. Remember that light source direction influences where shadows and highlights fall, enhancing realism and visual impact.
Adding Details with Liners
Liners are the finishing touch that elevates a face painting design from good to exceptional. Employ a fine-tipped brush and highly pigmented paint – often white or black – to outline shapes, define features, and introduce intricate details. Liners provide crispness and clarity, making the design ‘pop’ and enhancing its overall impact.
Use liners to accentuate eyelashes, create delicate patterns, or add texture to scales or fur. For complex designs, sketch a light guideline before applying the liner, ensuring accuracy. Practice consistent pressure for a uniform line width.
Don’t be afraid to experiment with different liner colors to complement your design. Remember, less is often more; a subtle liner can be more effective than a heavy one.
Face Painting Safety and Removal
Prioritize safety by using non-toxic paints and avoiding the delicate eye area; gentle removal techniques preserve skin health and ensure a positive experience;
Choosing Non-Toxic Paints
Selecting the right paints is paramount for safe and enjoyable face painting. Always opt for paints specifically labeled as “non-toxic,” “face paint,” or “cosmetic grade.” These formulations are designed for skin contact and minimize the risk of allergic reactions or irritation.

Avoid using acrylic paints, tempera paints, or other craft paints, as these often contain harsh chemicals and pigments unsuitable for the face. Look for paints that are FDA-compliant and hypoallergenic, especially when painting children or individuals with sensitive skin.
Water-based face paints are generally preferred over oil-based paints, as they are easier to apply, blend, and remove. Before each use, perform a patch test on a small area of skin to check for any adverse reactions. Reputable brands prioritize safety and provide detailed ingredient lists, ensuring peace of mind for both the artist and the recipient.
Avoiding the Eye Area
Protecting the eyes is absolutely crucial during face painting. The eye area is incredibly sensitive and prone to irritation, so it’s best to avoid applying paint directly to the eyelids, eyebrows, or under the eyes. Even non-toxic paints can cause discomfort or allergic reactions if they come into contact with the eyes.
Instead of painting directly around the eyes, consider creating designs that extend towards the eyes without actually touching them. Utilize strategic placement and creative linework to achieve a visually appealing effect while maintaining safety.
If a design necessitates proximity to the eyes, use extreme caution and ensure the paint is thoroughly dry before allowing any movement. Always advise the recipient to keep their eyes closed during application and removal near this delicate area. Prioritize safety above all else.
Proper Paint Removal Techniques
Gentle removal is key to preserving skin health after face painting. Avoid harsh scrubbing, which can irritate the skin. Warm water and mild soap are your best friends; use a soft washcloth to gently wipe away the paint in circular motions.
For stubborn paints, consider using a dedicated face paint remover or baby oil. Apply a small amount to a cotton pad and gently rub the painted area. Always test a small patch of skin first to ensure no adverse reaction occurs.
Follow up with a moisturizer to replenish the skin’s hydration. Thorough removal prevents clogged pores and potential breakouts. Remember, patience and a gentle touch are essential for a comfortable and safe experience.

Face Painting for Different Occasions
Adapt designs to suit the event! Halloween calls for spooky creations, birthdays demand cheerful themes, and festivals inspire bold, colorful expressions for all ages.
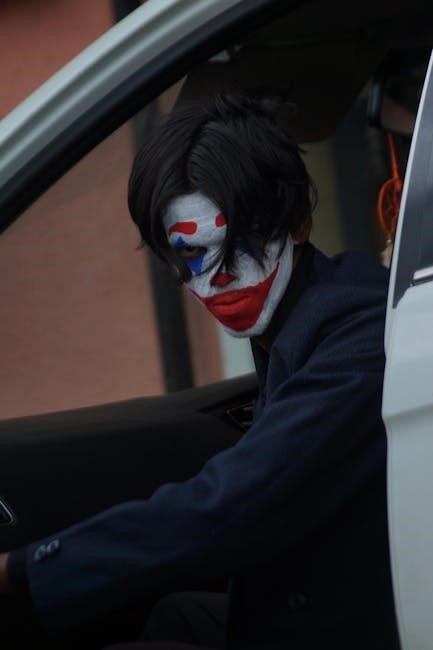
Halloween Face Painting Ideas
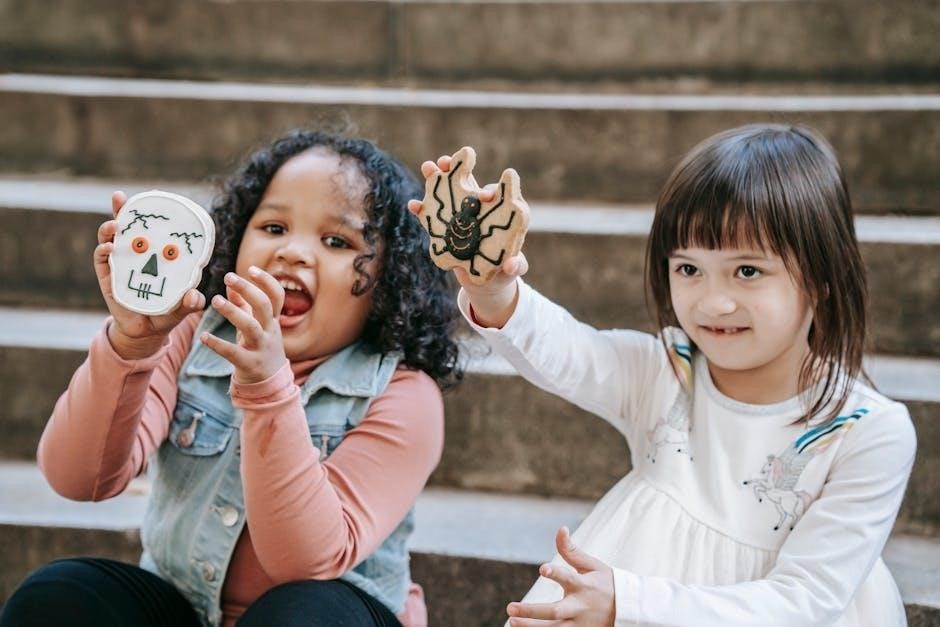
Halloween is the perfect time to unleash spooky creativity! Classic designs include ghosts, pumpkins, and witches, easily achieved with orange, black, and white face paints.
For a ghostly effect, use a white base and subtle grey shading. Pumpkins require orange as a base, carved details in black, and a green stem. Witches can be depicted with green skin, a pointed hat (painted or added as a prop), and a wart or two!
More advanced ideas involve creating zombie looks with green and purple hues, highlighting bone structure with white, and adding fake blood for dramatic effect. Spiderwebs, painted with a fine liner brush, add a creepy touch. Remember to prioritize safety, avoiding the eye area and using non-toxic paints. Consider incorporating glitter for a magical, eerie sparkle!
Transform your look with this epic monster face paint tutorial, ensuring a frighteningly fun Halloween experience for everyone involved.
Birthday Party Face Painting
Birthday parties are a fantastic opportunity for colorful and cheerful face painting! Popular choices for younger children include butterflies, kittens, and rainbows – designs that are relatively simple yet visually appealing.
Butterflies can be created with symmetrical wing designs using vibrant colors like pink, purple, and blue. A kitten face involves a pink nose, whiskers, and cute ears. Rainbows are best painted across the forehead or cheekbones, utilizing all the colors of the spectrum.
For older children, consider superhero masks, princess crowns, or animal faces like tigers or lions. Remember to ask the child their preference! Prioritize quick designs to keep the line moving and maintain excitement. Always use hypoallergenic, non-toxic paints and maintain a clean workspace for a safe and enjoyable experience.
Ensure a memorable birthday celebration with dazzling face art!
Event and Festival Face Painting
Events and festivals demand face painting designs that are bold, eye-catching, and durable, capable of withstanding movement and extended wear. Popular themes often align with the event’s overall atmosphere – think floral designs for spring festivals or spooky creations for Halloween events.
Larger designs, like full-face animal transformations or intricate tribal patterns, work well in these settings; Glitter and temporary tattoos can add extra sparkle and appeal. Consider offering a menu of pre-designed options to expedite the process and manage crowds effectively.
Prioritize quick-drying paints and waterproof sealants to prevent smudging. A well-organized station with ample seating and clear pricing is essential. Remember to adapt designs to suit diverse age groups and preferences, ensuring a fun experience for everyone!
Create lasting memories with vibrant festival face art!