
uponor hepex installation manual
Uponor HepEX Installation Manual: A Comprehensive Guide
This manual details Uponor’s HepEX systems, covering installation, connection techniques, and design considerations for radiant floor heating and hydronic piping applications.
Uponor HepEX represents a leading-edge cross-linked polyethylene (PEX) piping system, engineered for both radiant floor heating and demanding hydronic piping applications. This system prioritizes durability, flexibility, and ease of installation. HepEX utilizes the unique ProPEX connection method, ensuring consistently reliable, leak-free joints.
The HepEX system is designed to accommodate a wide range of residential and commercial projects, offering solutions for new construction and retrofit scenarios. Uponor provides comprehensive support, including detailed design assistance manuals (HPDAM & PDIM) and robust installation guidelines. Understanding these resources is crucial for successful project execution. Proper installation practices, as outlined in this manual, are vital for maintaining Uponor’s warranty and ensuring long-term system performance.
Understanding HepEX Pipe and Fittings
Uponor HepEX pipe is manufactured from high-quality, cross-linked polyethylene (PEX-a), offering exceptional resistance to corrosion and scaling. It’s available in various sizes to suit diverse application needs. HepEX fittings, integral to the ProPEX connection system, are engineered for a secure, long-lasting seal.
These fittings come in a variety of configurations – elbows, tees, couplings, and more – to facilitate complex piping layouts. Crucially, HepEX fittings are designed for expansion, accommodating thermal movement within the system. Correct fitting selection, based on pipe size and application, is paramount. Always refer to Uponor’s documentation for compatibility charts and specific installation recommendations regarding pipe and fitting combinations.
Tools Required for HepEX Installation
Successful HepEX installation hinges on utilizing the correct tools. Essential items include a ProPEX expansion tool – either Milwaukee or Uponor branded – matched to the pipe’s diameter. Pipe cutters designed for PEX are crucial for clean, square cuts. A deburring tool removes internal burrs, ensuring smooth connections.
Calibration tools verify expansion tool accuracy. Measuring tapes, markers, and potentially, a PEX tubing bender are also beneficial. Milwaukee tools often feature auto-rotation, while Uponor tools may require manual head changes. Always prioritize safety glasses and gloves during the installation process. Refer to tool manuals for proper operation and maintenance.
ProPEX Expansion Tools — Milwaukee
Milwaukee ProPEX expansion tools streamline HepEX installation, particularly those with auto-rotation features. These tools automatically rotate during the expansion process, reducing user fatigue and improving efficiency. They utilize interchangeable expander heads (H-series) to accommodate various pipe sizes.
Ensure the correct head is securely attached before operation. Milwaukee tools are known for their durability and robust construction. Proper calibration is vital for consistent expansion. Always consult the tool’s manual for safety guidelines and maintenance procedures. These tools are designed for professional plumbers and offer a reliable solution for high-volume ProPEX connections.
ProPEX Expansion Tools, Uponor
Uponor also offers ProPEX expansion tools, often featuring a design without auto-rotation. These tools require manual rotation during the expansion process, providing a cost-effective option for installers. Like Milwaukee tools, Uponor expanders utilize interchangeable H-series expander heads for different pipe diameters.

Proper technique is crucial when using tools without auto-rotation to ensure consistent and accurate expansion. Regularly inspect the expander heads for wear and tear, replacing them as needed. Always refer to the Uponor tool manual for detailed instructions and safety precautions. These tools are a dependable choice for professional PEX installations.
Preparing the Pipe for Connection
Proper pipe preparation is paramount for creating secure and leak-free ProPEX connections. Begin by ensuring the HepEX pipe is cut squarely and cleanly, avoiding any burrs or ovalization. Following the cut, meticulous deburring is essential; remove all internal and external burrs using a deburring tool specifically designed for PEX pipe.
Thoroughly clean the pipe’s exterior and interior surfaces to eliminate any debris, dirt, or manufacturing residue. This cleaning process ensures optimal adhesion and a reliable seal when the fitting is inserted. A clean pipe surface is critical for a successful ProPEX connection, preventing potential long-term issues.
Cutting HepEX Pipe
HepEX pipe requires a clean, square cut for reliable ProPEX connections. Utilize a dedicated PEX pipe cutter – either a ratcheting or scissor-style tool – designed to prevent ovalization or burrs. Avoid using a saw, as it can create uneven edges and debris.
Ensure the cutter is properly adjusted to the pipe’s outer diameter for a precise cut. After cutting, inspect the end of the pipe; it should be perfectly round and free from any imperfections. A clean cut minimizes the risk of leaks and ensures a secure fit within the ProPEX fitting. Proper cutting is the foundation of a successful installation.

Deburring and Cleaning the Pipe
Following the cutting process, HepEX pipe must be deburred and cleaned to guarantee a watertight ProPEX connection. Even with a quality PEX cutter, a slight burr can remain inside the pipe’s edge. Utilize a Uponor-approved deburring tool to remove this internal ridge, ensuring a smooth surface;
After deburring, thoroughly clean the pipe’s interior and exterior with a clean, dry cloth to remove any shavings or debris. Contaminants can compromise the seal. This step is critical; a clean pipe allows the expansion process to create a secure, leak-free joint. Neglecting this step can lead to costly repairs.
Making ProPEX Connections: General Tips
Successful ProPEX connections rely on consistent technique and attention to detail. Always ensure the pipe is cut squarely and deburred correctly, as previously detailed. Before expanding, verify the correct expander head size is selected for the HepEX pipe dimension.
During expansion, maintain a firm, steady grip on the expansion tool. Insert the pipe fully into the fitting immediately after expansion, utilizing a twisting motion to seat it properly. Hold the pipe firmly in place while the pipe contracts. Remember, speed isn’t crucial; accuracy is. Following these guidelines minimizes the risk of leaks and ensures long-lasting performance.
Step-by-Step ProPEX Connection Process
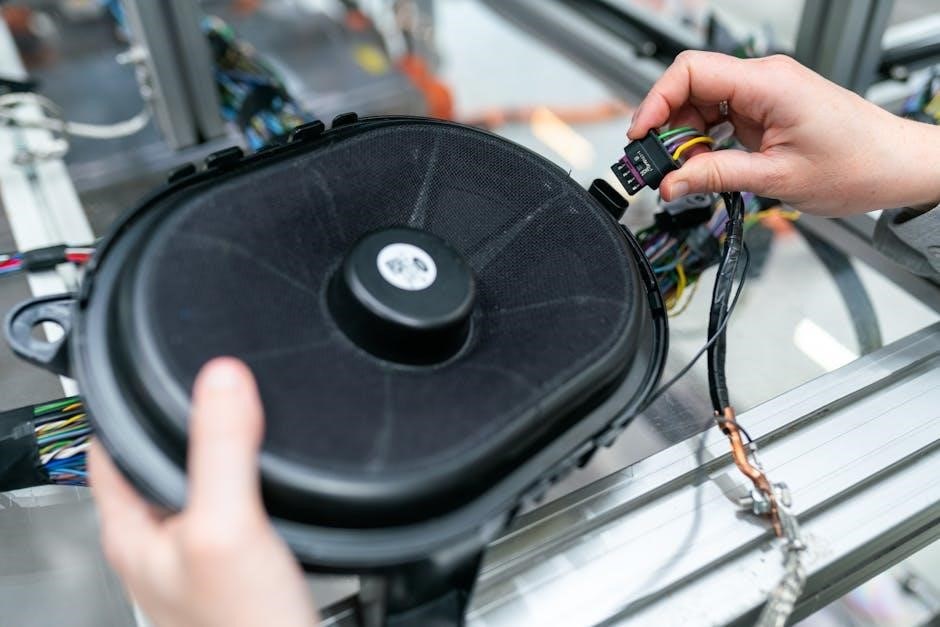
Begin by inserting the deburred HepEX pipe end fully into the ProPEX fitting, ensuring it reaches the shoulder. Next, securely attach the appropriate expansion head to your ProPEX expansion tool. Expand the pipe end evenly, holding the tool firmly and rotating it for a consistent expansion.
Immediately after expansion, swiftly insert the expanded pipe fully into the fitting, utilizing a slight twisting motion to fully seat it. Maintain a firm hold on the pipe as it contracts, preventing it from pulling back out of the fitting. This ensures a watertight seal. Verify the connection visually for proper insertion depth.
Inserting the Pipe into the Fitting
Prior to expansion, carefully insert the cleanly cut and deburred HepEX pipe end into the ProPEX fitting. Ensure the pipe reaches the fitting’s shoulder – this is the point where the pipe’s outer diameter meets the fitting’s internal stop.
A smooth, straight insertion is crucial; avoid angling or forcing the pipe. The pipe should slide in relatively easily, indicating proper sizing and preparation. This initial insertion establishes the correct depth for subsequent expansion and seating. Confirm the pipe is fully engaged before proceeding to the expansion stage, guaranteeing a secure connection.
Expanding the Pipe
With the HepEX pipe correctly inserted into the ProPEX fitting, utilize the appropriate ProPEX expansion tool – either Milwaukee or Uponor – and the corresponding expander head (H-series). Firmly attach the tool to the pipe end and activate the expansion mechanism.
Expand the pipe evenly and to the full diameter specified for the pipe size. Avoid over-expansion, which can compromise the pipe’s integrity. The expansion process increases the pipe’s outer diameter, allowing it to easily slide over the fitting’s barb. This step is critical for creating a watertight, secure connection.
Inserting the Pipe Fully and Holding
Immediately after expanding the HepEX pipe, swiftly and firmly insert it over the ProPEX fitting’s barb, ensuring it reaches its full depth. This must be done while the pipe remains expanded, as it will quickly return to its original size. A visible “stop” on the fitting indicates the correct insertion depth.
Maintain constant, firm pressure on the pipe as it contracts. Hold it securely for approximately 30-60 seconds, allowing the pipe to fully grip the fitting barb. Releasing pressure too soon can result in a compromised connection and potential leaks; Proper holding time is crucial for a reliable, long-lasting ProPEX joint.
HepEX Installation in Radiant Floor Heating
HepEX installation within radiant floor heating systems requires careful planning and execution. Securely fastening the HepEX tubing to Joist Trak systems is paramount, utilizing appropriate clips and spacing to ensure even heat distribution. Begin installation at the perimeter of the room, addressing areas with the highest heat loss first.
Layout considerations are critical for efficient radiant circuits. Maintain consistent loop lengths and avoid sharp bends to optimize water flow. Utilize aluminum heat emission plates as guides for precise tubing placement. Proper spacing and securement prevent movement and ensure optimal thermal performance of the radiant floor system.
Securing HepEX to Joist Trak Systems
Uponor Joist Trak systems provide a robust foundation for HepEX radiant floor heating. Secure the tubing using specifically designed clips compatible with the Joist Trak profile, ensuring a snug but non-constricting fit. Install 1×6 furring strips perpendicular to the joists as a starting point for securing the aluminum plate guide.
Maintain consistent clip spacing, typically every 6-12 inches, to prevent tubing movement and ensure uniform heat distribution. Proper clip selection and placement are crucial for long-term system reliability. The aluminum plate acts as a guide during installation, facilitating straight runs and accurate spacing of the HepEX tubing within the Joist Trak system.
Layout Considerations for Radiant Circuits
When designing radiant circuits with HepEX, begin at the perimeter of the space, specifically areas with the highest heat loss, like exterior walls. This ensures optimal thermal comfort. Plan circuits to maintain balanced flow rates, typically aiming for a maximum circuit length of 200-300 feet, depending on the system’s flow rate and tubing diameter.
Avoid sharp bends in the HepEX tubing to minimize flow restriction. Utilize gradual curves and consider zoning strategies to accommodate varying heat demands within different areas. Proper circuit layout is vital for efficient and even heat distribution, maximizing the benefits of the radiant floor heating system;
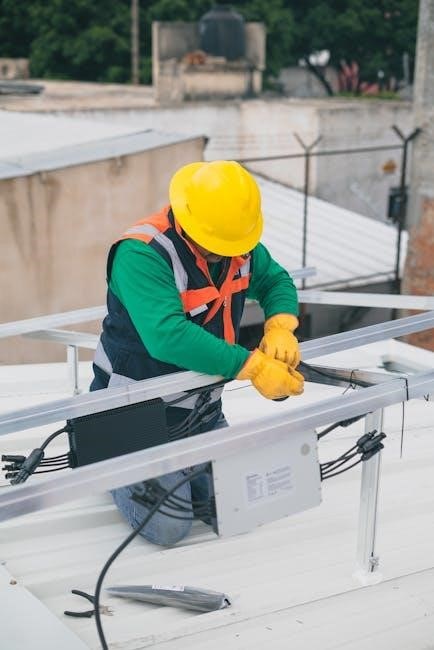
HepEX Installation for Hydronic Piping
HepEX is well-suited for hydronic piping systems, offering durability and flexibility. The Hydronic Piping Design Assistance Manual (HPDAM) provides crucial guidance for architects, engineers, and contractors. Prioritize corrosion prevention by understanding material compatibility and utilizing appropriate corrosion inhibitors within the system.

Properly designed hydronic systems utilizing Uponor PEX piping require adherence to local codes and best practices. Careful consideration of pipe sizing, flow rates, and system zoning is essential for optimal performance. Refer to the HPDAM for detailed recommendations regarding system design and component selection for long-lasting, efficient operation.
Design Assistance Manual (HPDAM) Overview
The Uponor Hydronic Piping Design Assistance Manual (HPDAM) serves as a vital resource for professionals involved in hydronic system design and installation. It details general recommendations specifically for Uponor PEX piping products, ensuring optimal system performance and longevity.
This manual is geared towards architects, building officials, engineers, and mechanical contractors. It emphasizes the importance of adhering to local building codes alongside Uponor’s guidelines. The HPDAM covers crucial aspects like material selection, corrosion prevention, and proper installation techniques, promoting reliable and efficient hydronic heating and cooling systems.
Corrosion Prevention in Hydronic Systems
Uponor hydronic systems prioritize corrosion prevention through the use of PEX piping, inherently resistant to corrosion unlike traditional metallic piping. However, a holistic approach is crucial. The HPDAM emphasizes proper water treatment to maintain optimal pH levels and minimize oxygen content, key factors in preventing internal corrosion.
Galvanic corrosion, arising from dissimilar metals, must be avoided. Uponor recommends using dielectric unions when connecting PEX to metallic components. Furthermore, proper system flushing before commissioning removes debris and contaminants that could accelerate corrosion. Consistent monitoring and maintenance are vital for long-term system health.
Storage and Handling of HepEX Materials
Uponor HepEX materials require careful storage and handling to maintain their integrity and ensure successful installations. Store coils and fittings indoors, protected from direct sunlight and extreme temperatures. Prolonged UV exposure can degrade the PEX material. Avoid storing materials directly on the ground; use pallets to prevent damage and contamination.
When transporting HepEX, secure loads to prevent shifting and potential damage. Avoid dropping or dragging materials. Inspect all components for any signs of damage before use. Proper handling minimizes the risk of compromising the system’s performance and longevity, upholding Uponor’s quality standards.
Troubleshooting Common Installation Issues
Uponor HepEX installations can occasionally present challenges. Leak detection is crucial; thoroughly inspect all ProPEX connections after pressure testing. Common causes include improper expansion, insufficient insertion depth, or damaged pipe. Expansion tool malfunctions, like inconsistent expansion, require immediate attention – check for worn expander heads or calibration issues.
If encountering leaks, re-examine the connection process. Ensure correct deburring and cleaning of the pipe. For tool issues, consult the tool’s manual or contact Uponor support. Addressing these problems promptly prevents system failures and maintains optimal performance, adhering to best practices.
Leak Detection and Repair
Leak detection in Uponor HepEX systems is best performed through pressure testing with air or water, following local codes. Visually inspect all ProPEX connections for any signs of moisture. Small leaks often indicate insufficient insertion or improper expansion during connection.
To repair a leak, depressurize the system, cut out the faulty connection, and re-make it following the correct ProPEX procedure. Ensure proper deburring and cleaning before re-connecting. For persistent leaks, verify the expander head is functioning correctly and hasn’t damaged the pipe. Always re-test after repair to confirm a secure seal.
Expansion Tool Malfunctions
Expansion tool malfunctions can lead to improper ProPEX connections and potential leaks. Common issues include worn or damaged expander heads, battery failures (for cordless tools), and motor problems. Regularly inspect expander heads for cracks or deformation; replace them as needed, noting the ‘H’ series designation.
If a tool fails mid-expansion, immediately stop and assess the connection. Partially expanded pipe may require re-expansion with a functioning tool. Ensure proper battery charging and maintenance. Uponor provides service and repair options for their tools; consult their website for details and authorized repair centers.
Adhering to Local Codes and Regulations
Uponor HepEX installations must comply with all applicable local plumbing codes and regulations. These codes often dictate specific requirements for materials, installation methods, and testing procedures. Always verify local requirements before commencing any work.
The Hydronic Piping Design Assistance Manual (HPDAM) highlights the importance of referencing local codes alongside Uponor’s recommendations. Failure to adhere to these regulations can result in failed inspections, costly rework, and potential liability issues. Consult with local building officials to ensure full compliance and a safe, reliable plumbing system.
Uponor’s Liability and Installation Practices
Uponor explicitly states it is not liable for installation practices that deviate from their published manuals or accepted mechanical trade standards. Proper installation, following guidelines within the PEX Piping Systems Installation Guide and other resources, is crucial for system performance and warranty validity.
Deviations from recommended procedures, including improper tool usage or incorrect connection techniques, void Uponor’s product warranties; Uponor emphasizes the responsibility of the installer to ensure adherence to best practices and local codes. Maintaining detailed records of the installation process is also recommended for potential future claims or inspections.
PEX Piping Systems Installation Test Questions
The PEX Piping Systems Installation Guide includes a comprehensive set of test questions designed to assess understanding of proper installation procedures. These questions cover critical areas such as pipe preparation, ProPEX connection techniques, and tool operation, including the ProPEX Expansion Tool.
Questions often reference the correct use of H-series expander heads and emphasize the importance of following manufacturer’s specifications. Successful completion of these tests demonstrates competency in Uponor system installation. Reviewing the manual thoroughly before attempting the test is highly recommended to ensure a solid grasp of the material and best practices.
Understanding H-Series Expander Heads

Uponor’s H-series expander heads are crucial components for creating reliable ProPEX connections. These heads, used with both Milwaukee and Uponor ProPEX expansion tools, are specifically designed for expanding HepEX pipe to the correct diameter for insertion into fittings.
The designation “H” in tables refers to these expander heads, indicating compatibility with specific pipe sizes. Proper selection and maintenance of the H-series heads are essential for achieving leak-free joints. Regular inspection for wear and tear is recommended, ensuring consistent and accurate expansion for optimal system performance and longevity.
Design and Installation Manual (PDIM) Details
The PEX Piping Systems Design and Installation Manual (PDIM) serves as a comprehensive resource for professionals working with Uponor HepEX systems. This manual details crucial design considerations, including pipe sizing, flow rates, and system layout optimization for both radiant floor heating and hydronic piping applications.
It provides guidance on material selection, proper installation techniques, and adherence to relevant industry standards. The PDIM emphasizes the importance of following recommended practices to ensure system efficiency, longevity, and compliance with local codes. Utilizing this manual is vital for successful and reliable HepEX installations.
Design Considerations for HepEX Systems
Effective HepEX system design necessitates careful attention to several key factors. Proper pipe sizing is paramount, determined by flow rate calculations and pressure drop considerations to ensure optimal thermal comfort. Layout planning should prioritize minimizing pipe length and avoiding sharp bends to reduce friction losses.
Furthermore, thermal expansion and contraction must be accounted for through the use of expansion loops or joints. The Design Assistance Manual (PDIM) provides detailed guidance on these aspects. Consideration of heat loss calculations, appropriate manifold selection, and zoning strategies are also vital for efficient and reliable system performance.